This is an example of how to connect to ADAM using Ldap Admin Tool.
To install & create instance of Adam, please read the tutorial http://www.codeproject.com/KB/aspnet/ADAM_and_LDAP_ClientNet.aspx
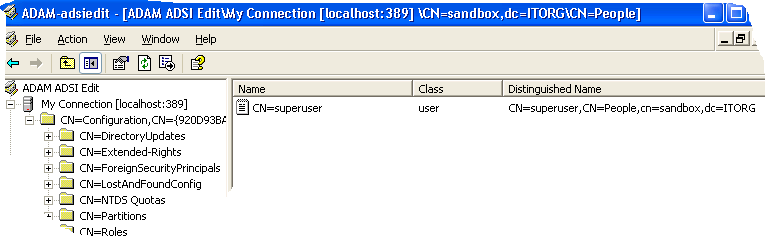
In order to connect to ADAM, you need the userDN to connect with. You can easily get the dn (Distinguished Name) from ADSIEdit
Now start LDAP Admin Tool by clicking on the LDAP Admin Tool shortcut.
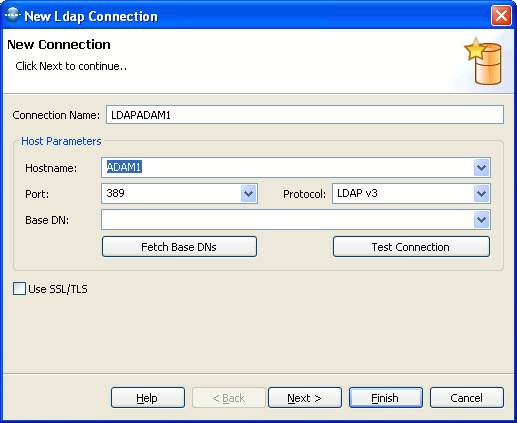
 Click the Create a new Connection link or Click the New Connection button from the main tool bar. The New LDAP Connection wizard opens.
 - Fill out the first wizard page that is displayed as follows:
- The “Connection Name” field should contain a unique name for this connection, this can be anything.
- The “Hostname” field should contain the address of the system running the directory instance (DNS name or IP Address of the machine. For example localhost or 127.0.0.1).
- The “Port” field should contain the port number on which the directory server is listening for client connections. In most cases it is 389 for non SSL connections and 636 for SSL connections. If you want to use SSL, then you will also need to check the “Use SSL/TLS” check box.
- The "Base DN" field can be left blank in most cases. However, if you want you can use the "Fetch Base DNs" button to select a base DN from the namingContexts attribute of the root DSE, or you can enter a specific base DN.
- To make sure that you entered the information correctly, click on the “Test Connection” button.
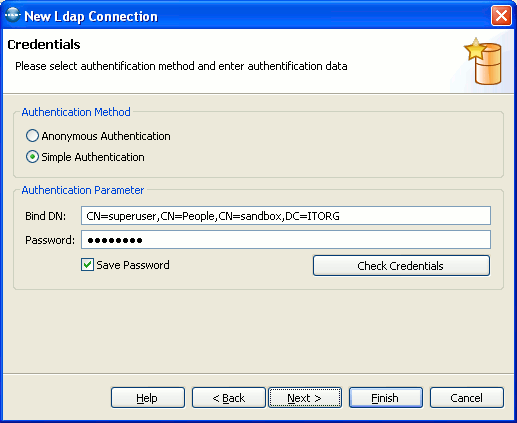
- If you only intend to browse the data and don't want to make any changes in the server, and if the server is configured to allow unauthenticated access, then you can click the “Finish” button to connect to directory server. However, if the server does not allow anonymous access, or if you may want to make any changes to the data in the server, then you will likely need to provide values for the "Bind DN" and "Password" fields. To enter credentials click the “Next” button.
- To provide values for “Bind DN” and “Password”, first click the “Simple Authentication” radio button, this will enable the fields. Now enter the values (DN from ADSIEdit and Password) and to make sure you typed in the right values click the “Check Credentials” button.
- If you want to provide the optional values click the “Next” button to go to third page else click “Finish” to connect to the directory server.
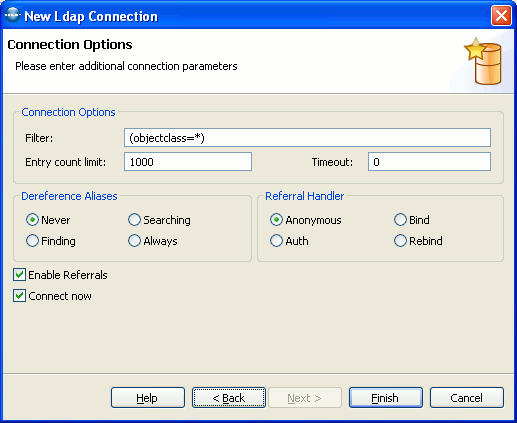
![]() In the wizard's third page select the additional connection parameter. If you are not sure what they should be just leave them to default and click Finish to connect to directory server.
In the wizard's third page select the additional connection parameter. If you are not sure what they should be just leave them to default and click Finish to connect to directory server.
- Derefence Aliases field sets a preference indicating whether or not aliases should be dereferenced, and if so, when
Never - do not dereference aliases
Searching - dereference aliases when searching but not when finding the base
Finding - dereference aliases when finding
Always - dereference aliases when finding the base object and when searching
- Entry count Limit should contain the maximum number of search results to return for a search request. 0 means no limit. Default is 1000.
- Timeout should contain the maximum time in seconds that the server should spend returning search results. This is a server-enforced limit. The default of 0 means no time limit.
- Enable Referrals specifies whether to automatically follow referrals or not. Check the box to follow referrals automatically. Default is true.
- To connect to the server on finish check the “Connect now” check box.
![]() Click Finish to connect to directory server.
Click Finish to connect to directory server.
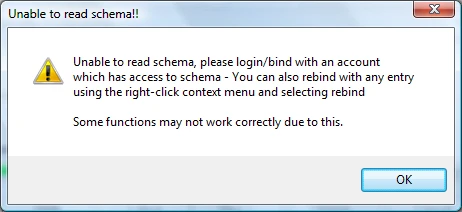
Unable to Read Schema
While connecting if you get a warning like this, you need to connect to ADAM with credentials.